How to Safely Remove a Tick From Your Dog
Ticks may look like other small, harmless insects, but they can carry dangerous diseases. If you find a tick on your dog, it must be removed properly. Here’s how to safely remove a tick from your dog:
Why is it Important to Remove Ticks From Your Dog?
Ticks aren’t just harmless insects hitching a ride on your dog. They are known carriers of a few diseases, which is why it’s so important to protect your dog from ticks. Lyme Disease is one of the most popular diseases carried by ticks but they can carry other diseases including:
- Ehrlichiosis
- Rocky Mountain Spotted Fever
- Anaplasmosis
- Tick Paralysis
Removing ticks is necessary to keep diseases from spreading to your dog. However, tick prevention is also a great tool to prevent diseases spread by ticks. There are many topical and oral preventative options available to protect your dog. While this tick prevention is a helpful spring safety tip for dogs, you can use it year-round, especially if you live in a warmer climate.
Regular grooming is also a good way to remove ticks because it allows you to examine your dog for ticks. It also may help remove ticks from your dog’s fur before they can attach to your dog. Regular grooming is also a great way to build a bond with your dog!
Common Hiding Spots for Ticks on Dogs
Ticks are great at hiding, and there are many places to look for ticks on your dog. An important spot to check is around a dog’s face and neck. Be sure to check under their collars! Other places include the inside of their ears, under their legs, under their tail, and between their toes.
How to Safely Remove a Tick From Your Dog
If you find one of those little buggers latched onto your dog, you need to safely remove and dispose of it. Improperly removing it can cause infections. Here’s how to safely remove a tick from your dog:
1. Gather The Right Tools
There are a few things you need to safely remove a tick from your dog. These are the supplies you should use:
- Tweezers or other tick removal tool
- Disposable gloves, preferably rubber or latex
- Antibiotic ointment
- Isopropyl alcohol
- Magnifying glass
- Extra light source, like a table lamp or flashlight
- Small container with a lid
- Treats
2. Help Your Dog Get Comfortable
Find a comfy spot where you have plenty of light or where you can set up an extra light source. Help your dog settle down so you can easily access the tick. It’ll be much more difficult to remove a tick safely if your dog is restless or anxious. If possible, another person can be helpful to keep your dog distracted and calm. Use treats as a distraction and to reward good behavior.
3. Find and Remove the Tick
Once you’ve identified the tick and your dog is comfortable, cautiously remove the tick with either tweezers or a tick removal tool. Be extra careful when attempting to remove any ticks attached closely to the areas around the eyes, mouth, or inside their ears. If it feels too risky for you to remove the tick, don’t be afraid to call your vet and have them do the removal.
Using Tweezers to Remove Ticks
Follow these steps if you’re using a pair of tweezers to remove the tick:
- Being careful not to pinch your dog’s skin, try to grab the base of the tick’s body to make sure you remove the head as well. If possible, try to get very close to your dog’s skin. Be sure not to squeeze the tick too much. Doing so may crush the tick, making it harder to remove.
- Once the tick is firmly held in the tweezer, slowly pull the tick away from your dog’s skin. Try to go steady, being careful to avoid any jerky movements. You want to avoid tearing the tick away from its head and leaving it embedded in your dog’s skin.
- Once you’ve removed the tick from your dog, examine it to be sure the tick is intact and no body parts are left behind in the skin.
- Reward your dog with a treat!
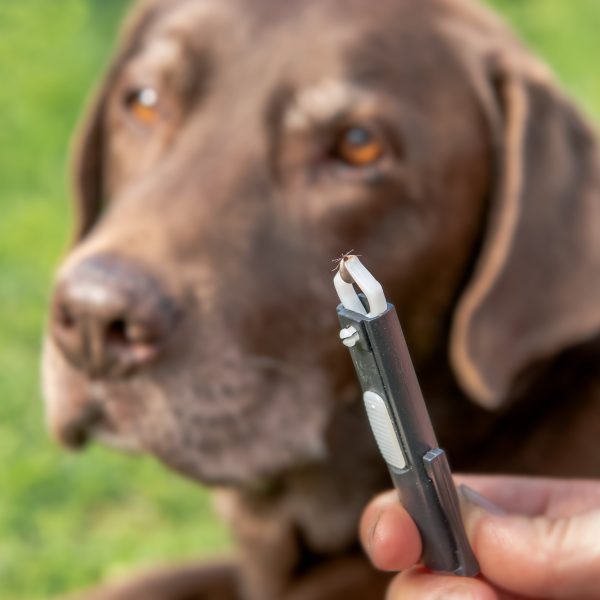
Using a Tick Removal Tool
Follow these steps if you’re using a tick removal tool:
- Using the tick remover, gently place the tool over the body of the tick and hook it in the tool’s notch.
- Depending on the tool’s directions, either slowly pull the tick or twist the tool until you see the tick detach from your dog’s skin. Once again, slow and steady movements are especially helpful.
- Carefully lift the tick once you can see it has fully detached.
- Inspect the tick to ensure it was removed properly and no body parts are left behind.
- Reward your dog with a treat!
4. Dispose of the Tick and Clean the Area
Once you’ve removed the tick, put it in a small container and douse it in the isopropyl alcohol. Don’t flush it down the toilet or throw it in the trash! You also shouldn’t try to squash it like a bug because you may be exposing yourself to any diseases it’s carrying.
Next, you need to disinfect the bite area on your dog. You can either use an antiseptic like hydrogen peroxide or soap and water. Once the area is dry, use an antibiotic ointment on the bite to prevent infections.
Antiseptics and antibiotic ointments are important to include in a dog first aid kit and should be easily accessible. If you notice any swelling, use a cold compress to bring it down. If the swelling continues over the next day or two, give your vet a call.
What To Do If the Tick Isn’t Fully Removed
Do not panic if you weren’t able to remove the tick intact. If this is the case, do not try and dig into your dog’s skin to get the rest of the body or head. This can lead to infections or inflammation. Call your vet and they can safely remove the rest of the tick in their office.
This is an overview of how to safely remove a tick from your dog. Proper tick removal is important to prevent diseases that can be harmful to your dog. And remember, it’s important to prepare your dog for tick season so hopefully you won’t be removing too many ticks!